Whether you’re an experienced camper or just starting to explore the great outdoors, knowing how to properly set up and take down a heavy-duty tent can make or break your adventure. A sturdy tent not only offers shelter from the elements but also provides a safe, comfortable space to relax after a day of hiking, fishing, or exploring. The process might seem daunting at first, especially with larger tents, but with the right steps, you’ll be pitching and packing like a pro in no time.
This guide walks you through the entire process, from choosing your tent site to folding it back up—so your next trip to a campsite near Manila or anywhere else goes smoothly.
Choosing the Right Spot
Before you even unpack your tent, take a few moments to assess your surroundings. Look for flat, dry ground, ideally slightly elevated so water doesn’t pool underneath if it rains. Avoid low-lying areas or spaces under large, loose branches.
If you’re staying at one of the popular campsites near Manila, chances are the ground is prepped for campers, but it’s still essential to check for rocks, roots, or uneven surfaces that could affect your sleep or damage your tent floor.
Shade is another factor. If you’re camping during warmer months, try to set up under a tree canopy or in a spot that gets shade during the hottest parts of the day. This keeps your tent cooler and more comfortable.
Laying the Groundwork
Once you’ve chosen your spot, clear the area of sticks, rocks, and any debris. Lay down a ground tarp or footprint. This acts as a barrier between your tent and the ground, protecting the base from punctures and moisture.
Make sure the tarp is slightly smaller than the tent base; if it extends out, it can collect rainwater and funnel it underneath your tent—something you definitely want to avoid.
Unpacking and Organizing
Unpack all parts of the tent and lay them out neatly. You should have the tent body, rainfly, poles, stakes, and guylines. Check your gear before every trip; damaged or missing components can lead to stressful situations at the campsite.
If you purchased your gear from a reputable outdoor store, chances are the staff walked you through each component. Still, it’s good to double-check before heading into the wilderness. Many seasoned campers even do a practice run in their backyard just to make sure everything works as expected.
Assembling the Frame
Start by assembling the tent poles. Most heavy-duty tents use color-coded or shock-corded poles, which makes setup easier. Once assembled, insert the poles into the appropriate sleeves or clips on the tent body. If your tent uses a hub system, snap everything into place according to the manufacturer’s instructions.
Now it’s time to raise the tent. This usually takes two people—especially for larger models. Carefully lift the tent by the poles and secure them into the corner grommets or pole pockets. The tent should now be standing upright and begin to take shape.
Take a moment to adjust its position. Make sure the doors face the direction you want and that the base is taut but not overly stretched.
Securing the Tent
Next, stake down the corners. Push stakes into the ground at a 45-degree angle, away from the tent, for better grip and wind resistance. Heavy-duty tents are designed to withstand stronger weather, so don’t skimp on this step.
Once the base is secure, attach the rainfly. This cover protects your tent from rain, dew, and UV rays. Align the rainfly over the tent body and connect it at each corner. Some models come with extra Velcro tabs to secure the rainfly to the poles, which adds stability during storms.
Finally, use guylines to stabilize the tent. These lines should be pulled taut and staked away from the tent body. Properly set guylines reduce flapping in the wind and keep the tent firm and steady.
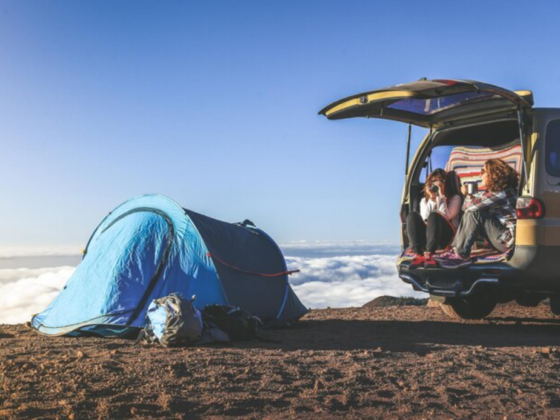
Enjoy the Outdoors
With your tent securely set up, you can now settle in and enjoy your surroundings. Whether you’re sipping coffee while watching the sunrise or stargazing with friends, a well-pitched heavy-duty tent becomes your basecamp for adventure.
Many travelers visiting campsites near Manila praise the variety of landscapes—from beaches to mountains—and how a quality tent enhances the entire experience. Don’t forget to visit a trusted outdoor store beforehand to gear up on essentials like sleeping pads, lanterns, and weather-appropriate clothing.
Taking Down Your Tent
After a few peaceful nights under the stars, it’s time to pack up. Taking down your tent properly ensures its longevity and keeps it in top condition for your next trip.
Step 1: Clean and Dry
Before dismantling, make sure the tent is dry. If it rained or there’s morning dew, give it time to air out. Packing a wet tent can lead to mold and mildew, which damages the fabric and creates unpleasant odors.
Shake out any dirt, leaves, or debris inside the tent. A small broom or brush can help. Some campers bring a portable handheld vacuum, especially when camping with pets or kids.
Step 2: Detach Components
Start by removing guylines and stakes. Pull stakes out carefully and clean them before packing. Avoid pulling on the cords or using too much force, which can damage the material.
Then remove the rainfly and fold it loosely. Unclip or slide out the tent poles. Collapse them according to their segments and store them in their designated bag. If your tent came from a well-stocked outdoor store, it likely includes color-coded instructions on folding everything back properly.
Step 3: Fold with Care
Lay the tent body flat, smoothing out wrinkles and air pockets. Fold the tent to match the width of your tent bag and roll it tightly with the rainfly and footprint, if applicable. Avoid overly tight rolls, as this can crease and damage the fabric over time.
Store everything in a breathable tent bag—avoid sealing it in plastic for long periods. Back at home, take the time to fully air out your tent one more time before storing it in a cool, dry place.
Final Tips
-
Practice at home: Set up your tent in your backyard or at a park before your trip. This eliminates confusion at the campsite.
-
Label parts: Use small tags or tape to label poles, stakes, and guylines. It helps speed up setup and takedown.
-
Use a checklist: Especially useful for beginners. Include all components plus extras like mallets, patch kits, and cleaning supplies.
-
Visit a quality outdoor store: Staff can offer valuable advice and even demonstrate setup techniques. They can also help you choose the right tent for the type of terrain and even recommend popular campsites near Manila and beyond.
With a bit of preparation and the right gear, setting up and taking down a heavy-duty tent doesn’t have to be stressful. In fact, it can be part of the fun. Each time you do it, you’ll become faster and more confident, letting you spend less time fumbling with poles and more time soaking in the sights and sounds of nature.
So, before you plan your next escape, swing by a local outdoor store, pick the right gear, and start exploring the many campsites near Manila. With your shelter sorted, the adventure truly begins.